|
|
Post by tarheeltinkerer on Mar 14, 2009 16:51:11 GMT -5
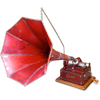
In the process of moving, a very good friend gave me an early birthday gift, an Amerbola 30. It needs a good cleaning, probably a refinish on all the black parts and the horn, and the front and top grills. The thing I'm curious about just looking at the unit is that the front horn edge does not have a post and screw holding it in place. There was a pin that was soldered at some to the edge of the horn that broke free. Is this an early design as opposed to the later post and nut method?
(I realize without pictures I am making no sense. I still have tons to move, so I'll try to get some up this coming week).
|
|
|
|
Post by maroongem on Mar 14, 2009 20:36:23 GMT -5
That pin rolled in a L shaped bracket that was screwed to the floor of the cabinet. Is the suspension spring still present the was attached to a hook on the top of the horn and then to a hook on the bottom of the bed plate? If the spring is still there, it should play ok until you repair the post assembly on the horn.
Bill
|
|
|
|
Post by tarheeltinkerer on Mar 18, 2009 20:34:42 GMT -5
Now that I am finally moved in, I wanted to begin to disassemble the Amberola 30. I will admit that I may need a schematic to figure out how it goes back together (doh!). Blame this on enthusiasm. First off, the only serial number I could find is stamped on the underside of the bedplate, number 46,541. There is no dataplate on the bedframe or the case lid. The reproducer number does not match this (as expected). The black finish is in excellent shape and I'm probably just going to try to degrease it, rub some automotive wax on it, and just leave it with the nice aged look. The case will require a lot more work, particularly with veneer repair and there is one joint that gave way that will need to be reglued. The inside of the horn is rusted and I'm not fully sure how to clean and repaint this. All suggestions are readily welcomed. Anyways, here are some pictures:       |
|
|
|
Post by matty on Mar 18, 2009 22:14:40 GMT -5
It looks like an earlier 30 than mine. The data plate is where the edison signature is in mine. I think yours should have had the data plate in the horn compartment.
Do you have the metal grille that sits in front of the bedplate?
I've got one here that's been repainted, and probably would need to be repainted again, but if you wanted you can have it.
|
|
|
|
Post by tarheeltinkerer on Mar 18, 2009 22:36:29 GMT -5
Judging that the number is under 100,000, I'm guessing it's one of the early models, in particular with them using up the Edison signature decal. I'm bidding on one of those metal grills, but if I lose out I would be happy to buy yours  |
|
diggr
New Member

Posts: 16
|
Post by diggr on Mar 19, 2009 9:09:47 GMT -5
Frank,
Not a bod looking machine. But it's distinctly different than mine. And maybe you could help me out as time permits.
I've taken the liberty to grab your last two photos as they are showing some detail of the speed adjuster. The one that came out of mine is clearly a cobbled up fix. A spring under the lever and a hex nut on the shaft that projects up through the cover. Yours has what appears to be a purpose built part in there. If or when you have the time, I would appreciate a closeup or two of that mechanism without the cover on. It would be a huge help in figuring out what I have to make to fix things.
Secondly is the bed plate on yours rigidly mounted to the case or are there pads of some sort between the plate and the mounts attached to the case. I thought I read somewhere that some damper material should be there to help isolate motor vibration from the case.
I also remember reading something that would indicate that the Diamond C reproducers don't have any meaningful numbers on them. Mine has one number on one part that I'm going to guess is probably a casting number.
How far apart are you planning to take the bed plate? I have mine completely apart now without breaking anything or hurting myself. ;D I even managed to get the spring out of the can on the motor. It's interesting that the assembled spring motor is a bit under 4" in diameter and yet the spring in the free state on a bench, measures some 14" in diameter.
|
|
|
|
Post by tarheeltinkerer on Mar 19, 2009 21:27:50 GMT -5
Diggr, I disassembled the entire unit today, degreased the motor, and reassembled it. Unfortunately, it's running slow. This seems to be the case after every cleaning I do and it drives me crazy. I'm using sewing machine oil, WD-40, and 3-in-one Oil. I didn't think they would slow things down but somehow they must be. Argh. In response your inquiries, here are photos of the speed adjuster. I hope these help. My bedplate was mounted with screws and nuts to the case with no dampening material present. There is a token "5" on the top part of the reproducer body that I found. The bedplate is EASY to disassemble, but a pain to put back together, as a few parts must be inserted at once and nothing tightened before everything fits in place. I did not pull the spring out of the can, but it is still a strong one from what I can tell.   |
|
|
|
Post by tarheeltinkerer on Mar 21, 2009 11:53:52 GMT -5
Well, after more tinkering, adjusting bearings, etc. I just can't get this thing to play as fast as my Standard B. It flies along while the Amberola is substantially slower. I have the speed knob adjusted as far as I can before the weights begin to hit the guide rail. The mandel bearing/lock nut is loose at the end to allow the mandrel to spin without interference. I lubricated all the bearings, have all the gears adjusted and yet it just won't go as fast as the Standard B. Should it? I thought all Edison ran around 160 RPM. I'm guessing the Amberola is still around 30 - 40 RPMs too slow.
|
|
|
|
Post by matty on Mar 21, 2009 12:28:50 GMT -5
I had the same problem when I put my Standard B together. What I had to do is move the governor friction plate further away from the governor leathers. When I pulled it down, I removed both governor bearings, and when I put it all back together, the worm gear ended up a couple spirals further along than it had been (if you know what I mean). Once I moved the governor & bearings along a bit more, it got up to speed. I remember having to adjust it twice though, because the first time I moved it too far & the weights were hitting the brake or something?? (I can't remember exactly now) I'd try moving the governor one tooth/spiral at a time until it's right. Just make sure the speed control isn't full in or out when you do it, so it leaves room for adjustment. I hope I've expained that without confusing you too much Since that episode, I now leave one of the governor bearings in it's original position. It saves a lot of mucking around later on. |
|
|
|
Post by tarheeltinkerer on Mar 21, 2009 12:39:18 GMT -5
How can you move the actual friction plate without shifting the bearings? The only screws on it are to hold the springs on to the brass section. If I remove the screws, can I slide the plate farther back?
|
|
|
|
Post by matty on Mar 21, 2009 12:53:19 GMT -5
There should be a small screw you can loosen at the stationary end of the governor (not the plate end) and the whole governor should slide along the rod. It should be somewhere inbetween the two screws that hold the weight springs. If you can't see a screw anywhere, the spring screws might be used to hold the end to the rod.
To be honest, I can't remember how mine was attached, but the small end will be held securely the the rod by one of the screws there.
I did have a speed problem with my 30 too, but it was the mandrel lock nut thing being a fraction too tight.
|
|
|
|
Post by tarheeltinkerer on Mar 21, 2009 13:06:48 GMT -5
Well, I made a video of the unit playing. Hopefully this can help clarify the issue:  |
|
|
|
Post by maroongem on Mar 21, 2009 16:24:43 GMT -5
Hi Frank,
The reason your weights are hitting the knife edge is because the governor assembly is too far forward. You will have to remove that brass nut at the end of the mandrel stanchion (again) take that adjustable collar off at the end of the mandrel and slide the mandrel off.
Then remove the mandrel shaft and the gear cluster that meshes with the worm gear. You can then adjust the governor assembly forward after loosening the set screws on the top. You want to have as little end shake as possible, ie the governor bearings being tight enough to allow free spinning but not to allow the governor assembly to move too much between them. You can test run the governor assembly before you replace the mandrel and related gearing. To test for speed if you don't have a strobe, you can tape a piece of paper to the end of the mandrel hanging off a bit and then with a watch with a sweep hand, count off 40 rpm in 15 seconds, letting the piece of paper hit your finger 40 times. That will give you 160 rpm.
Edit: I forgot to mention that the governor assembly too far forward will also push the governor disc too tight against the brake pads as there is little forward & backward movement on the horse shoe.
Bill
|
|
|
|
Post by bostonmike1 on Mar 21, 2009 17:34:15 GMT -5
Bill---the advice you just gave could not be more CORRECT!!!! i realize that we are allowed an opinion for a correction/repair,but the previous posting from "authorities" such as G.S. makes my brain hurt. YOU are a knowledgable man with valid insight. Michael
|
|
|
|
Post by matty on Mar 21, 2009 19:48:12 GMT -5
Sorry about that Mike, but I don't "claim" to be an authority on anything, although Bills advise is basically the same- move the governor |
|